

This easy polish dill pickle recipe is made with cucumbers, dill, garlic, mustard seeds, salt, and water. They're crunchy, tangy, and delicious!

Have you ever made homemade pickles? These polish dill pickles are crisp and way better than anything you'll find at the grocery store.
Why you'll love this recipe
- Great taste: This polish dill pickle recipe is bursting with garlicky, dill flavor.
- Quick fermentation process: By storing the jar of pickles at room temperature, they'll be ready to eat in 1-3 weeks, rather than the standard 4-6 weeks.
- Skip the canning process: The boiling water bath processing is not necessary, but you will need a sterilized quart jars.
What's the difference between polish dill pickles and kosher dill pickles?
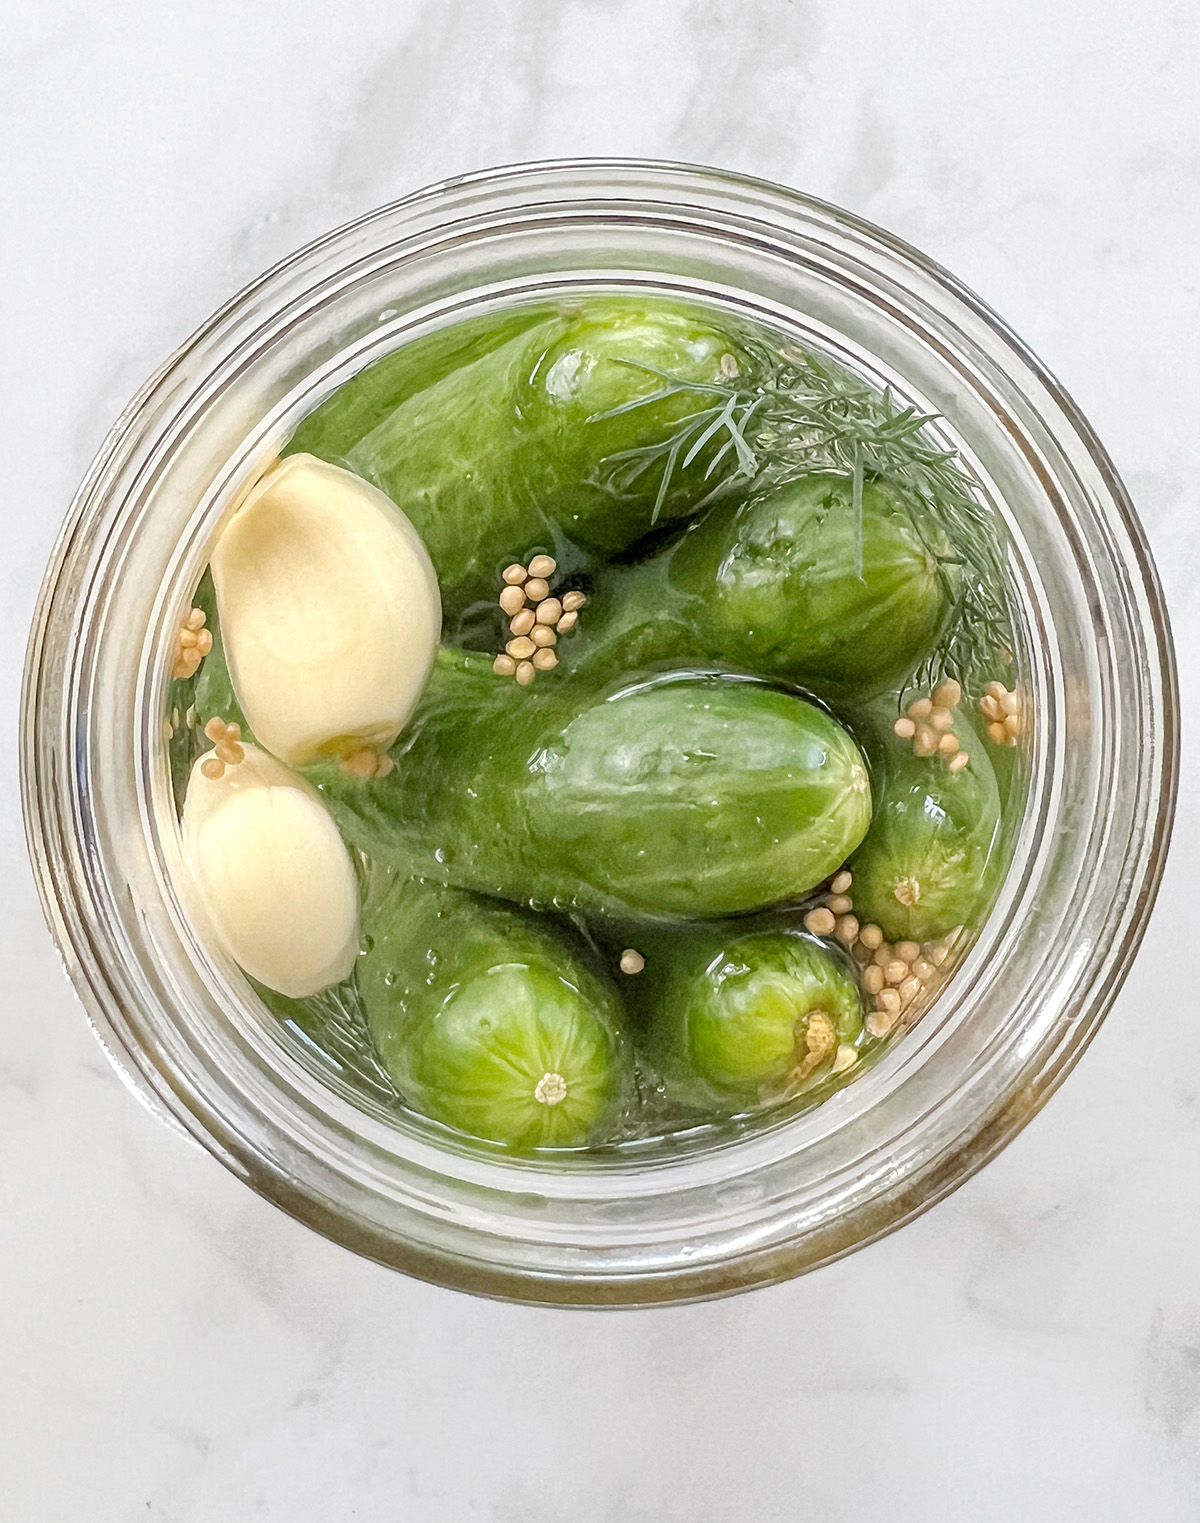
Polish pickles or ogórki kiszone comes together with small cucumbers, fresh dill, garlic cloves, mustard seeds, salt, and water.
They often contain more dill than kosher dill pickles and resemble the color of pickled green olives.
What about homemade refrigerator pickles? Those are preserved in vinegar, instead of salty water.

Ingredients
You just need a quart sized jar and a handful of simple ingredients to make the best polish pickles at home!
- Pickling cucumbers: Small, fresh cucumbers are needed.
- Mustard seeds: A necessity for adding flavor.
- Garlic: Just peel the garlic cloves, you can keep them whole or slice them in half.
- Fresh dill: Dill stems with flowers are best but fresh dill sprigs work great too.
- Pickling salt: You can substitute with kosher salt as an easy alternative.
- Water: We'll be using filtered, cold water.

How to make polish pickles
The full directions for this polish pickle recipe are in the printable recipe card below. This 1-quart batch serves 8-10 people, but you can double the recipe to serve a larger crowd.
Step 1: Sterilize equipment
Sterilize the jar and lid, then set aside. Peel garlic, wash dill, and scrub cucumbers.

Step 2: Assemble ingredients
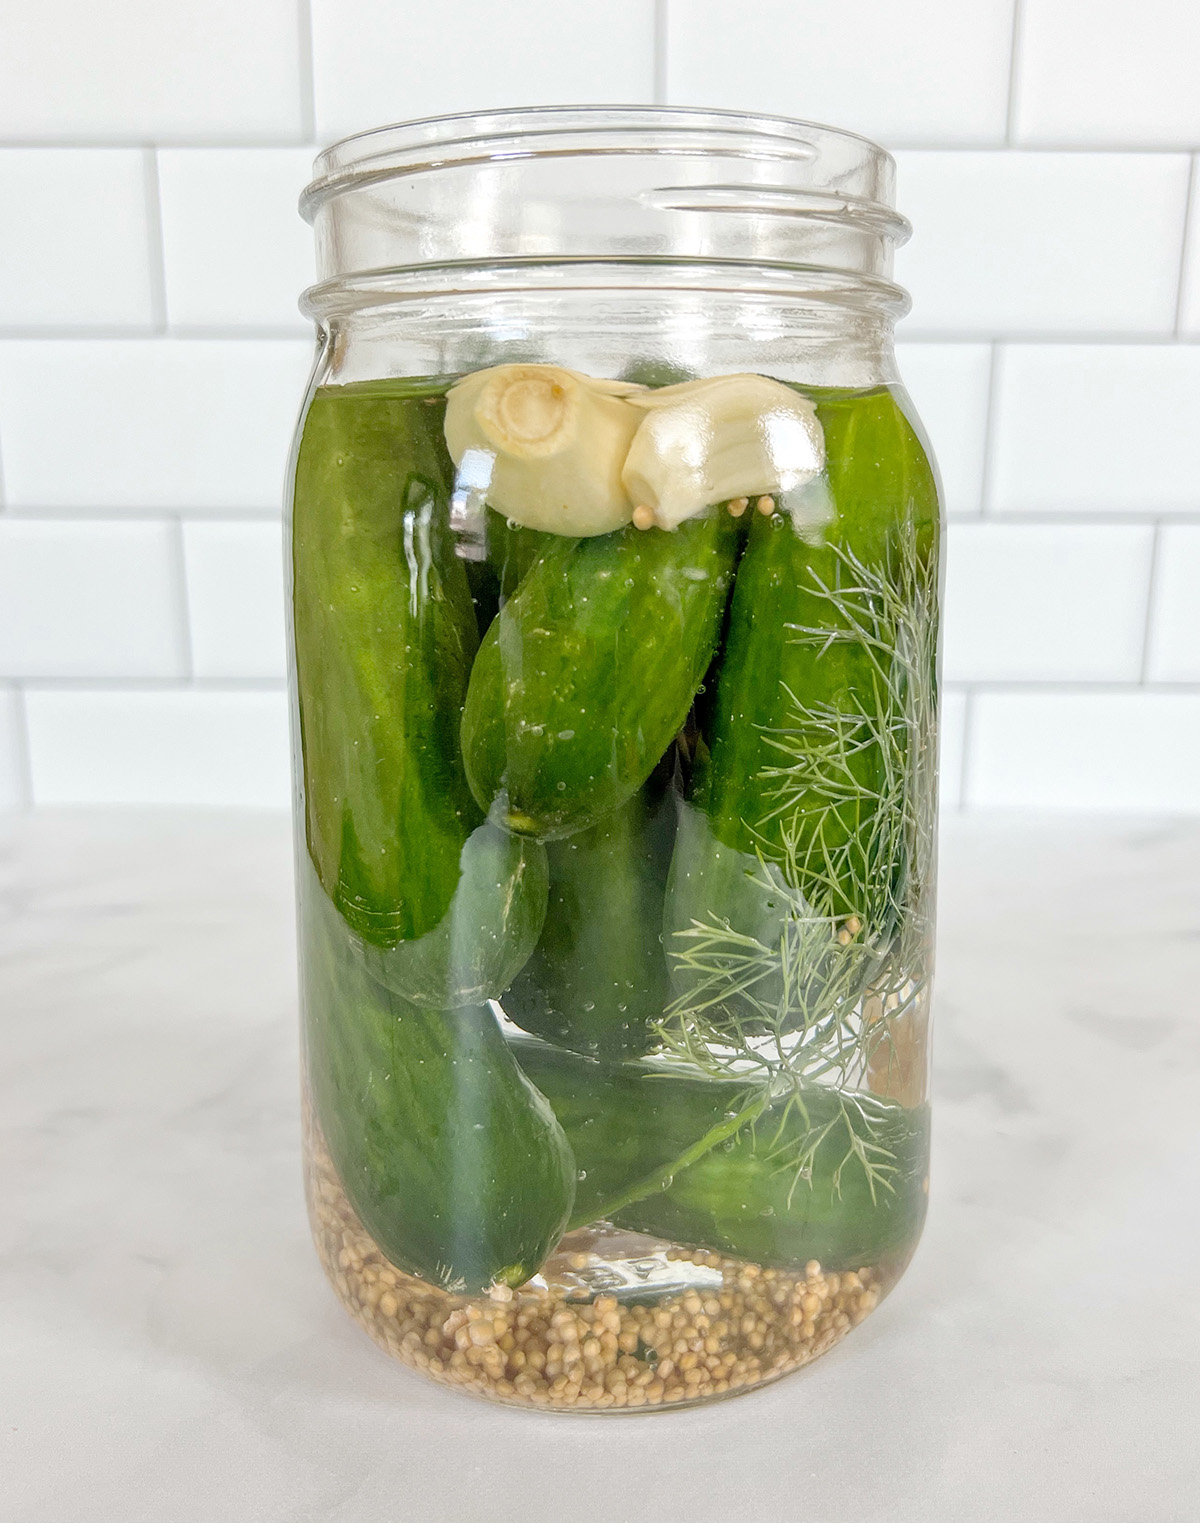
Add mustard seeds, garlic clove, and dill to a 32-ounce mason jar. Tightly pack cucumbers in the jar. Dissolve the salt in water then pour into the jar, leaving a ¼-inch gap from the top.
Step 3: Ferment pickles
Cover jar loosely with lid and store at room temperature (70F-75F) on a tray. The lid needs to be loose to allow the gases produced in the fermentation process to escape.
Depending on your taste buds, polish dill pickles are ready to eat in 1-3 weeks. Once brine turns murky and cloudy, they are ready. At this point, the lid should be completely sealed then stored in the refrigerator for 4-6 months.

Serve fermented polish pickles as a snack, in polish dill pickle soup, with a salad, or sandwich.

Polish Dill Pickle Recipe
Equipment
Ingredients
- 10 small cucumbers
- 2 garlic cloves
- 1 dill stem
- 1 tablespoon mustard seeds
- 1 ½ tablespoon pickling salt
- 1 quart filtered water
Instructions
- Sterilize the jar and lid, then set aside. Scrub the cucumbers, peel the garlic, and gently wash the dill.
- Add the mustard seeds, garlic, and dill to the clean jar. Tightly pack the cucumbers in the jar. Dissolve the salt in water then pour into the jar. Make sure to leave a ¼-inch gap from the top of the jar.
- Cover the jar loosely with the lid and store at room temperature (70F-75F) on a tray. The lid needs to be loose to allow the gases produced in the fermentation process to escape.
- Depending on your taste preferences, the polish pickles are ready to eat in 1-3 weeks. Once the brine turns murky and cloudy, they are ready. At this point, the lid should be completely sealed then stored in the refrigerator for 4-6 months.
Notes
Nutrition

Leave a Reply